To save any changes you make, click "Save" and close the window. The changes will now have taken effect in the tray popup menu.
Drag and drop is supported: You can drag/drop items inside the "treeview" and you can drag and then drop items into the "tree view" from e.g. "Windows Explorer".
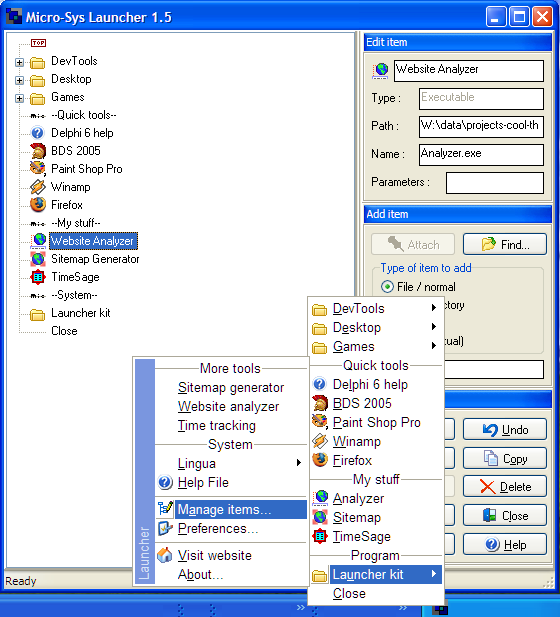
- How to add items without drag and drop:
- First select the type of item you want to add.
- If the type selected is either "File / Normal" or "File / Directory" use the "Find..." button to browse through your computer. Choose the wanted file or directory.
- In the text edit box below you can write what you want the name of the item to be. If the selected item is a "Separator", what you write will show up as "--your text--".
- Select where you want the item to be attached (it will be inserted under the item selected in the "treeview"). You can use the "top" item type at the top of each "virtual folder" when adding items.
- Use the "Attach" button to actually attach/fetch the item to the "tree view". Remember, the item will be attached below the item selected/marked in the "tree view" control.
There is context sensitive help in the "statusbar" at the bottom of the window. Just hoover the mouse cursor over a given button or control.